Description
I am working on a humidity sensor and I would like to display a water droplet image on a lvgl with some additional effects.
What MCU/Processor/Board and compiler are you using?
What LVGL version are you using?
LVGL v8.2.0
What do you want to achieve?
Display a water droplet with the following effects:
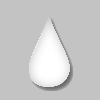
- As humidity increases/decreases the filling of water droplet should change. For example, if detected air humidity is 15%, then approximately 15% of the water droplet should be colored in blue, the rest of the water droplet is white or transparent. See example that I sketched using paint below:
- I would like to add animation to my water droplet to create an effect that water inside a droplet is “moving”. Example here:
Beautiful Blue Water Wave Background Blue Stock Footage Video (100% Royalty-free) 1067500973 | Shutterstock
What have you tried so far?
-
I tried to draw a water droplet using squareline studio but did not manage to draw complex figures, only simple figures can be drawn from what I know (square,circle and etc)
-
I tried to display a transparent water droplet image as png file and managed to do it just fine. But I havent found a way on how to add color fill to an image and animate it.
Code to reproduce
Didint manage to setup a simulator yet, but the code I use for the esp32 is as following:
lv_obj_t * main_screen;
lv_obj_t * droplet_image;
lv_obj_t * humidity_label;


LV_IMG_DECLARE(droplet_transparent)


void display_transparent_water_droplet(void)
{
    main_screen = lv_obj_create(NULL);
    lv_obj_clear_flag(main_screen, LV_OBJ_FLAG_SCROLLABLE);      /// Flags

    droplet_image = lv_img_create(main_screen);
    lv_img_set_src(droplet_image, &droplet_transparent);
    lv_obj_set_width(droplet_image, LV_SIZE_CONTENT);   /// 1
    lv_obj_set_height(droplet_image, LV_SIZE_CONTENT);    /// 1
    lv_obj_set_align(droplet_image, LV_ALIGN_CENTER);
    lv_obj_add_flag(droplet_image, LV_OBJ_FLAG_ADV_HITTEST);     /// Flags
    lv_obj_clear_flag(droplet_image, LV_OBJ_FLAG_SCROLLABLE);      /// Flags

    humidity_label = lv_label_create(main_screen);
    lv_obj_set_width(humidity_label, LV_SIZE_CONTENT);   /// 1
    lv_obj_set_height(humidity_label, LV_SIZE_CONTENT);    /// 1
    lv_obj_set_x(humidity_label, -1);
    lv_obj_set_y(humidity_label, -65);
    lv_obj_set_align(humidity_label, LV_ALIGN_CENTER);
    lv_label_set_text(humidity_label, "Humidity");

    lv_disp_load_scr(main_screen);
}
Since I am a new user, it wont let me put more than 2 media items (I wanted to show the result generated by the code above but it wont let me  )
)
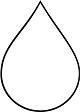
Adding a png water droplet that I used:

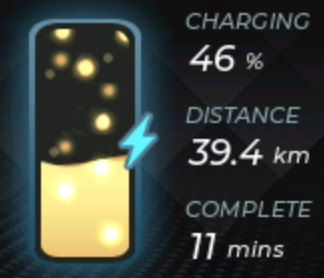
Open Squareline studio example futuristic bike and use batery animation as source.
Live demos - Test LVGL in your browser | LVGL
If you do not want to have color around the droplet, meaning you want that area to be transparent is going to be using a sequence of images and you change the image_src every x milliseconds using an LVGL timer. The better way to do this is to create an object and inside that object create an image and in that image you would have your “water” The water image would be wider than the parent object. You would add a second image which would be the droplet. The area outside of the droplet would be the same color that you plan to use as the background. and the area inside of the droplet would be transparent. The droplet image would be the save size as the parent object. By changing the left to right position of the “water” image it would look like the water is moving inside of the droplet and by moving the water image up and down would change how full the droplet is.
It’s actually not too terribly hard to do. The hardest part is making the 2 images to produce the effect you want.
The EBike example in SquareLine studio uses the overlaying images but in a different manner. It is not “animated” in the typical sense. They set an image to a slider indicator to control the amount that is visible and on top of the slider there is an image so only the areas that are the gauges would show the slider through them.
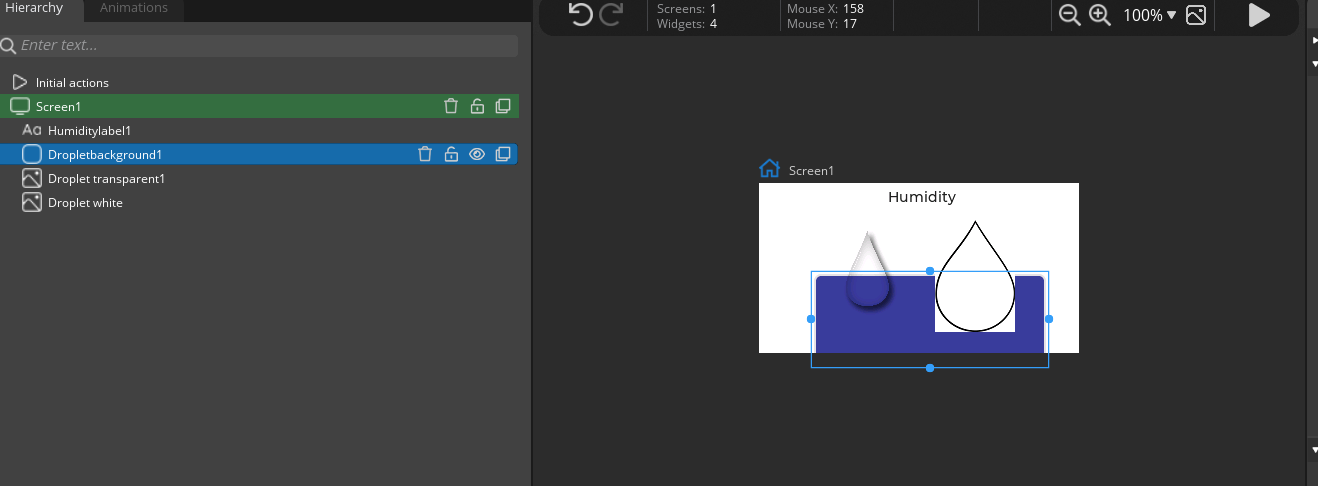
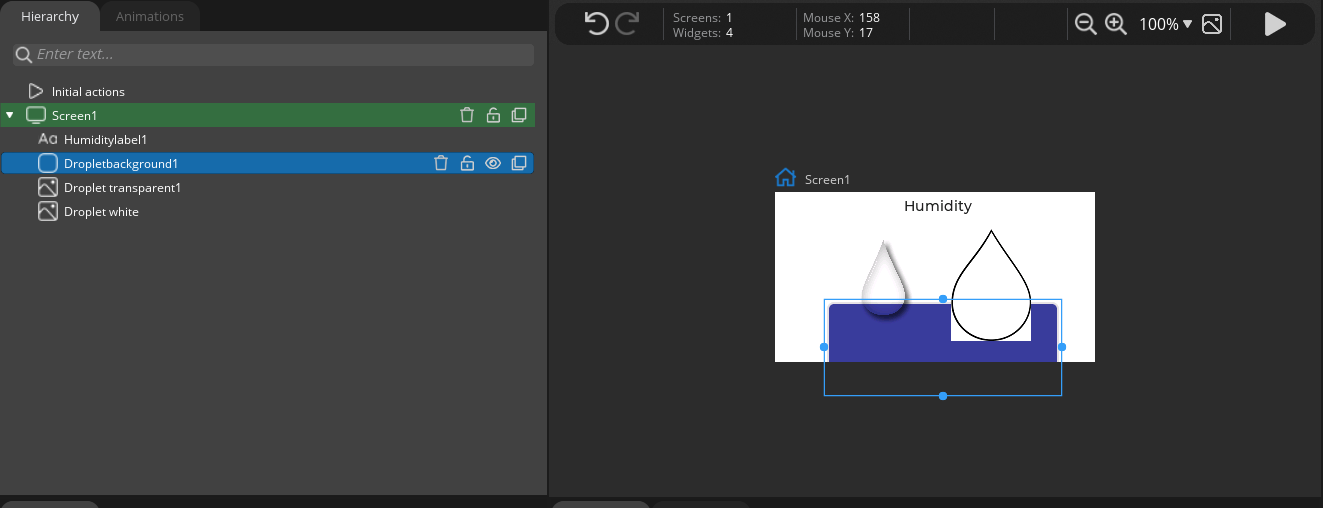
Thank you very much for good suggestions. I think I sort of understand what you mean but not 100%. I have tried to simulate it on SquareLine studio:
- Import a transparent water droplet image size 100x100 and another water droplet that is not transparent (Just to see the difference between the two)
- Create a square panel and place it behind the water droplet (Ensure the water droplet is infront).
- By moving the square panel up/down I can simulate the how full is the droplet, see the images below:
Water droplet half full:
Water droplet almost empty:
As you can see from the images below, I have tested with 2 different droplet images (one is transparent and the other one is not). From what it looks like, it works better when the water droplet is transparent.
I dont understand how to solve the following:
- How can I ensure that everything outside the droplet remains background color and only inside the water droplet is colored?
Images used for the above example:
All required info is in bike example.
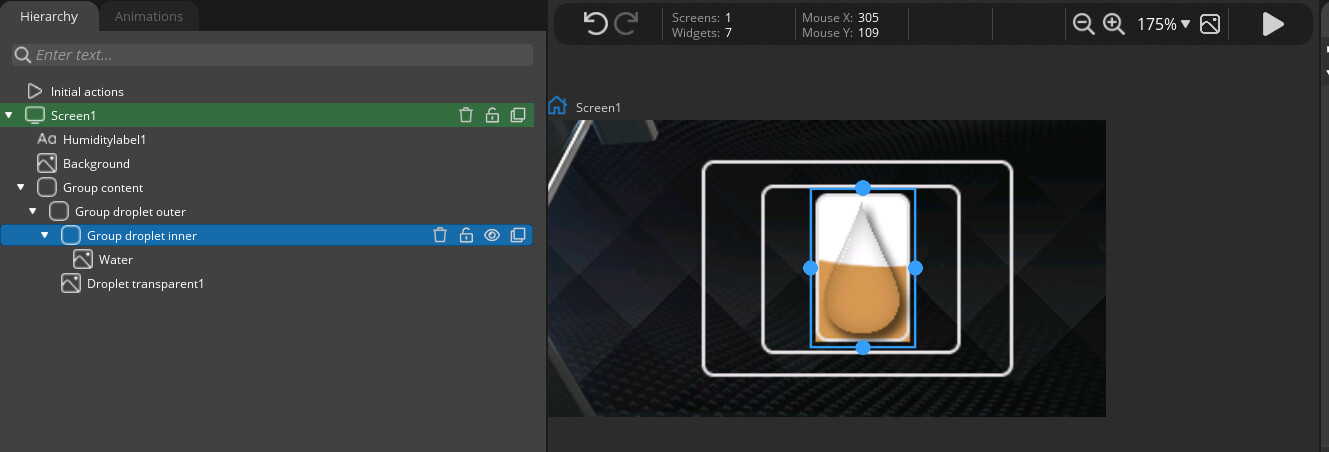
I have been studying the e-bike example for a while and I am starting to get a grasp on how it is done. It is using groups (panels) to ensure some areas are hidden beneath other areas. I try to incorporate the same principles for my water droplet project and I got very close to what I want:
Ignore the Panel border (white border). This is just easier for me to know the border size. When the UI is ready to be deployed for production, I will make the borders transparent so it blends with the background.
The only thing that I could not solve how to do is to change the shape of “Group droplinet inner” to match the water droplet shape to ensure the “water” does not go beyond the water droplet border.
In the e-bike example the shape used for battery is a rectangle so that is not an issue, but since I use a little bit more complex shape, I cant find a way to do this.
You have to use a paint program to color the area outside the droplet the same color as you are going to set as the background
This is the arrangement of what you need to do.
create object that has a parent of the screen
create the water image that has the parent of the object. The water image is going to be larger in side than the object.
Create an image for the droplet that has a parent of the object. The image for the droplet should be colored to match the background color you are going to use for the screen. Only the areas outside the droplet should be this color. The area inside of the droplet should be transparent.
The object that is the parent of the droplet image should be set to the same size as the droplet image. Doing this does not allow the water image to show anywhere except for the transparent area of the droplet. You can set the vertical position of the water image which will display like a “level” inside of the droplet and using an animation or a timer you change the horizontal position of the water to achieve what looks like moving waves. Ideally you want the water image to have a transparent background where there is no water, optionally it can also be colored the same as the screen background color.
easiest way to think about it is if you make layers of paper that are different colors and on the top piece of paper you cut a hole in it and you move the middle piece of paper around what do you see in the hole you cut in the top piece of paper. You are essentially making a window
I think this is the part that I am struggling with. I cant make the group droplet inner the same size as my droplet image (It needs to be droplet shape)
I posted a couple of minutes before you did. Did you see my approach that I copied from the e-bike example?
The droplet image is a square/rectangle. It is width x height. you are always dealing with rectangles/squares.
make an object that has a size of 100 x 100
make another object that has the size of 100 x 100 and set that objects parent to the first one (drag and drop it into the first object in the tree). set the position of the second object to be 0, 50. set the background color of the second object to 0, 0, 255 with an opa of 255
then add this image below
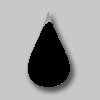
set it’s size to 100 x 100 and drag and drop it onto the first object, make sure it is listed after the second object
Groups is required only if you plan hide or move somethink on display over other objects on same place.
And i show you image what you need use. You need understand , how use alpha layer in images.
First of all, thank you very much for your patience helping me…
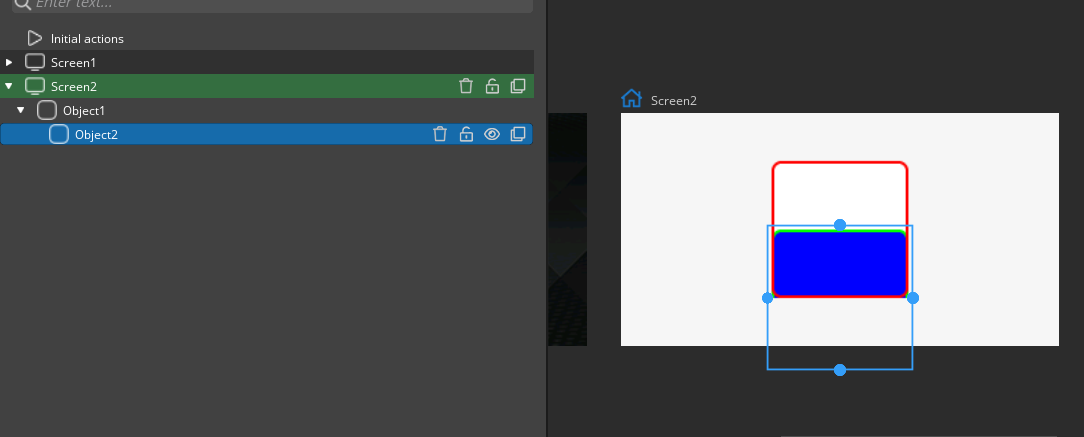
I create new SquareLine project and try the steps that you explained.
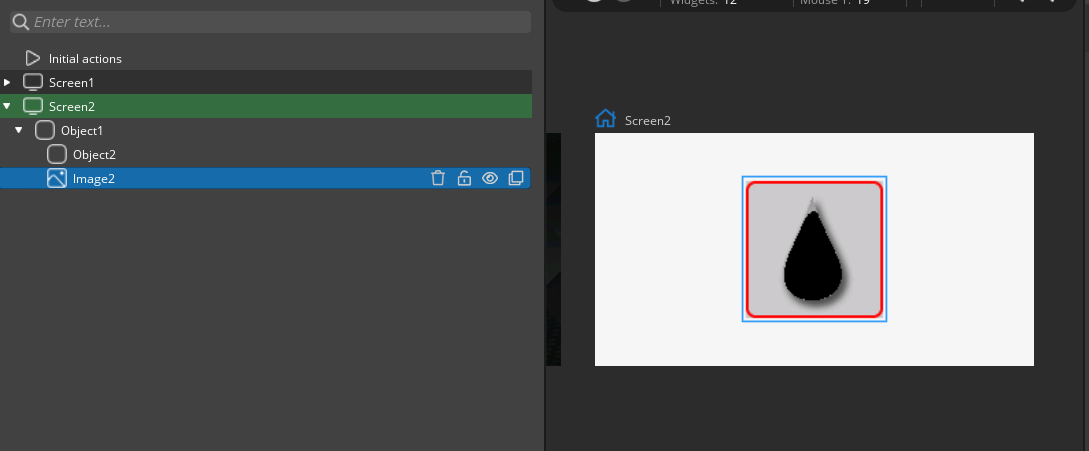
- Create object1 the size 100x100. Additionally, I added red border color for this object so I can visually see it.
- Create object2 the size 100x100, background color 0000FF (blue) and opacity 255. Move this object with and Y offset of 50px Make object2 child of object1. Additionally, I added green border color for this object so I can visually see it.
The result after these 2 steps are as following:
- I save the image that you upload (the water droplet with black color). I drop it onto the first object making sure its listed after the second object. The result:
Is this an expected result or I did something wrong?
The image should not have a black center. Not sure why it did that.

you are saving the image as a png file yes?
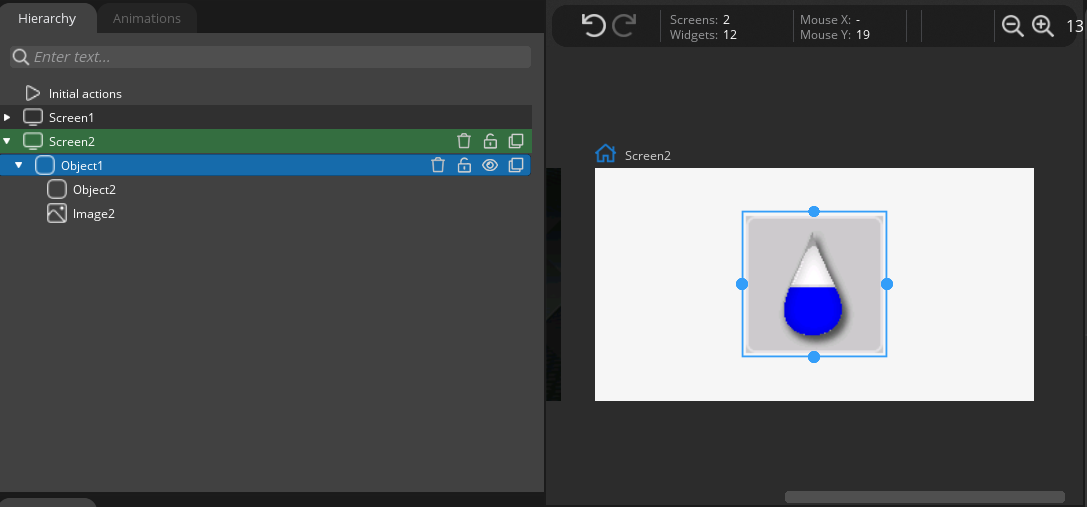
Yes I save it as PNG. It works with the new image that you have uploaded - Thanks.
The result:
Although I am not 100% sure why and how it works. Can you please tell me how/why did you modify the water droplet image? Is that because my initial water droplet image did have a transparent background (not the interior of the water droplet but exterior) and that is not ok?
Do I must ensure that the image I choose for the droplet does have some sort of background and it must blend with the display background that I choose
I had to make the area around the droplet in the image so it has a color to cover the blue that extends past the droplet
Think piece of paper with a hole cut in it the shape of the droplet and you lay that paper on top of a piece of blue paper. what happens?
Droplet becomes blue! Thank you very much. I think I now got a basic grasp on how this works! My initial mistake was that the droplet image that I chose did not have a some background around the droplet.
That is correct.
Now if you replace object 2 with an image of waves of water and that image has a width of say 300 and you slide that image left to right what do you think it’s going to look like? It is going to look like it is an animation when it is really just changing the position.